# Linux/network course
# DHCP / Router class
Tuesday, Nov 19th 2024
---
## Static DHCP leases
### In **`router`**
Execute `sudo vim /etc/dnsmasq.conf`:
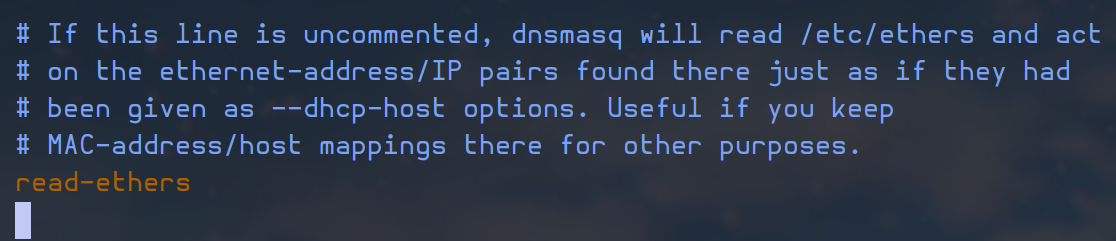uncomment `read-ethers` to enable the `/etc/ethers` configuration file
Create a new file `/etc/ethers` to assign an `IP address` to the specific `MAC adresses` of the `www` and `sql` machines:
```bash
sudo vim /etc/ethers
```
```
# www MAC address and static DHCP lease
ff:ff:ff:ff:fd 192.168.56.80
# sql MAC address and static DHCP lease
ff:ff:ff:ff:fe 172.16.13.54
```
you need to retrieve the `MAC` addresses of `sql` and `www`(these here are dummy addresses)
Add the two new static `IP addresses` to the `/etc/hosts` file:
```
127.0.0.1 localhost router
192.168.56.10 router
172.16.13.10 router
192.168.56.80 www
172.16.13.54 sql
```
Restart the `dnsmasq` service:
```bash
sudo service dnsmasq restart
```
### In **`www`** and **`sql`**
Renew the `DHCP lease`:
```
sudo dhclient -r ens19 && sudo dhclient ens19
```
here `ens19` is the interface connected to the `router`
Now we should have the correct `IP addresses` on `sql` (`172.16.13.54`) and on `www` (`192.168.56.80`).
---
## Router `forwarding` and `SNAT`
### In **`router`**
First we need to enable the `forwarding` feature of `IPv4` for `sql` and `www` to be able to communicate:
```Bash
sudo sysctl -w net.ipv4.conf.all.forwarding=1
```
Now we need to enable the `SNAT` for `www` and `sql` to be able to send requests to the outside (through the `WAN` interface of the `router`):
```bash
sudo apt install iptables
sudo iptables -t nat -A POSTROUTING -o ens18 -j MASQUERADE
```
here `ens18` is the `WAN` interface
### In **`www`** and **`sql`**
We have two `network interfaces` in `www` and `sql` so far, and they are using the wrong one as default, so we need to change that.
Command for **`www`**:
```bash
sudo ip route del default
sudo ip route add default via 172.16.13.10
```
Command for **`sql`**:
```bash
sudo ip route del default
sudo ip route add default via 172.16.13.10
```
Now `www` and `sql` shouldn't be able to communicate to each other nor have access to the web.
---
## Traffic rules
As we are now, everyone has access to everything, because `iptables` has an `ACCEPT` default policy for `INPUT`, `FORWARD` and `OUTPUT`.
The first thing we'll do here is restrict the communications between `sql` and `www`.
For that, we can add rules to the `FORWARD` section of the `iptables`, but that would be bothersome to add `DROP` rules for every protocol/port we want to block, so we'll instead modify the default policy of the `FORWARD` section to `DROP` and then add all accepted transactions.
Change the `FORWARD` default policy to `DROP`:
```bash
sudo iptables --policy FORWARD DROP
```
You shouldn't be able to `ping` or connect via `ssh` or any other communication over the network between `sql` and `www`.
Now we want to be able to `ping` across the `router`, so we'll add a rule to accept all requests using the `ICMP` protocol:
```bash
sudo iptables -I FORWARD -p icmp -j ACCEPT
```
We can see what we've done so far with that command:
```bash
sudo iptables -L -nv
```
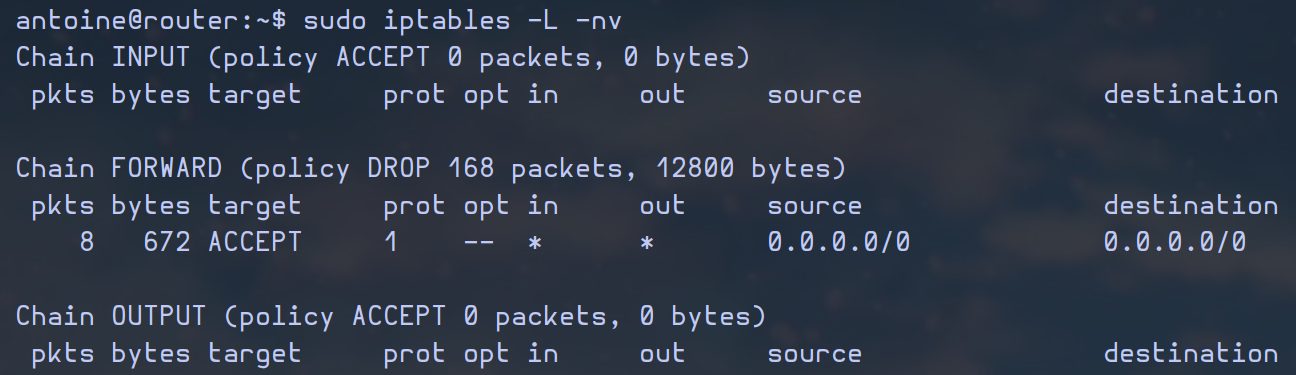output of the command
# Router installation
Antoine de Barbarin
12/12/2024
---
## Introduction
In this documentation, we will explain how to set a router serving two different networks.
The **router** will not only serve as **DHCP** server and **router**, but also as a **firewall** and a **logging facility** for the two subordinated networks.
We will then have three networks: the `WAN`, the `LAN1` and the `LAN2`.
We will install `Debian 12 bookworm` in it due to its reliability.
### Requirements
- a computer with three network interfaces at least
- 20 GB of hard drive minimum
- 1 GB of RAM minimum
- an `iso image` of `Debian 12 bookworm`
## Installation
### Initial setup
1. **BOOT**: we begin the installation booting with the `Debian 12 bookwork` **iso image** (it can be the `netinstall` one if you prefer).
> As the `router` will only be a server, we will not need any graphical interface, and it will be the same for the installer.
2. **INSTALL**: choose the `Install` option instead of the `Graphical install`.
3. **LANGUAGE**: choose the `English` language.
4. **TIMEZONE**: choose `other`, then `Europe`, and finally `France`.
5. **LOCALE**: choose the **locale** `United States en_US.UTF-8`
6. **KEYBOARD**: choose the keyboard you prefer (`French`, or any other).
7. **HOSTNAME**: type the **hostname** `router`.
8. **DOMAIN**: leave the domain name **blank**.
9. **ROOT**: enter a good `root` password (make sure to follow the conventions of your enterprise) and confirm it.
10. **USER**: create a new **user** and name it `router` or the name of your choice (according to your conventions).
11. Enter a good password respecting the conventions of your enterprise and confirm it.
12. **DISK PARTITIONING**: choose the `manual partitioning`.
### Partitions
13. For the manual partitioning, first create the `boot` partition, and then create the **lvm** `volume group` **vg0**, in which you will create all the `lvm partitions`.
Partition name
Type
Mount point
Allocated space
boot
ext4
/boot
1GB
root
lvm
/
3GB
tmp
lvm
/tmp
1GB
var
lvm
/var
5GB
var\_log
lvm
/var/log
1GB
usr
lvm
/usr
3GB
home
lvm
/home
1GB
swap
lvm
*swap type: no mount point*
1GB
14. Accept and apply the partitioning.
### Last steps
15. **MIRROR**: to the `Continue without a network mirror?` question, answer **`No`**.
16. Choose the first mirror based in `France` if your server is located there (it should be the `deb.debian.org`).
17. **PROXY / PACKAGE SURVEY**: leave the `proxy` option blank and do not accept the **package survey**.
18. **SOFTWARE SELECTION**: as said beforehand, this server will **not** need any `graphical` environment, so only check the `SSH Server` and `standard system utilities`.
19. **GRUB**: accept to install `grub-loader`, it will let your computer boot without problem on `debian`.
> **`WARNING`**: if you don't accept `grub`, you will not be able to turn your system on, so it's a crucial step.
20. Select the `sda` disk (it should be the one you used for the partitioning).
21. **FINISH**: click on continue when the installation is finished.
---
## Configuration
> In this section, we will be logged in with the `router` account.
### Install packages
1. Update your system and install the necessary packages:
```bash
apt-get -y update
```
> If you have an issue with this command about the `CDROM`, you need to edit the `/etc/apt/sources.list` with the editor of your choice and comment the line beginning with `deb cdrom`. Rerun the `update` command after modifying this file.
```bash
apt-get -y install curl sudo net-tools tcpdump rsync
```
> You can also install other packages like `vim psmisc git`.
```bash
apt-get -y install dnsmasq rsyslog logrotate iptables iptables-persistent
```
2. The `iptables-persistent` installation should ask you if you want to save the `ipv4` and `ipv6` configurations. Choose **`No`**.
### `sudo` configuration
3. To set `sudo` up for your `non-root User`, run the following command:
```bash
visudo
```
4. Then uncomment the line `#%sudo ALL=(ALL:ALL) ALL` removing the `#` character at the beginning of the line, then press `Ctrl + X` to save, `Y` to confirm and `Enter` to overwrite the config file.
5. Now all users that are in the `sudo` group will be able to act as `root` using the command `sudo`, but your user may not be part of it yet.
6. To add a specific user to the `sudo` group, run the following command (replace `router` with the user you want):
```bash
usermod -aG sudo router
```
### Network
Here we will configure the `network interfaces` of the `router`.
7. Get the names of the `network interfaces` using the `ip a` command (there should be at least four, including the `loopback`).
8. Open the `/etc/network/interfaces` file with your favorite text editor (`vim`, `vi`, `nvim`, `nano` or any other).
9. Configure your three interfaces like the following (replace the **`INTERFACES`** and **`ADDRESSES`** with the corresponding ones):
```bash
# This file describes the network interfaces available on your system
# and how to activate them. For more information, see interfaces(5).
source /etc/network/interfaces.d/*
# The loopback network interface
auto lo
iface lo inet loopback
# Other network interfaces
allow-hotplug
iface inet dhcp
auto
iface inet static
address
auto
iface inet static
address
```
> The `WAN` interface will then be set to `dhcp` and the two `LAN` interfaces will be `static`.
10. **`DNS Entries`**: to add specific `DNS` entries in your `router`, you can edit the `/etc/hosts` file like in the example below:
```bash
127.0.0.1 localhost
# The following lines are desirable for IPv6 capable hosts
::1 localhost ip6-localhost ip6-loopback
ff02::1 ip6-allnodes
ff02::2 ip6-allrouters
# WWW network
192.168.56.10 router
192.168.56.80 www
# SQL network
172.16.13.10 router
172.16.13.54 sql
```
> You just need to add a pair of `IP address` - `hostname` on a blank line, separated by spaces.
### DHCP
11. **`Static DHCP leases`**: to set static `DHCP` leases, you need to create a new file named `/etc/ethers`. Here is an example:
```bash
## Static DHCP leases
# SQL server
bc:24:11:cf:34:b2 172.16.13.54
# WWW server
bc:24:11:2c:a7:2d 192.168.56.80
```
> This file takes `MAC address` - `IP address` pairs, so that a specific `MAC address` will take the specified `IP address` from `dnsmasq`.
12. Enable the `read-ethers` option in `/etc/dnsmasq.conf`: open the file with your text editor and uncomment the `#read-ethers` line removing the leading `#` character:
```bash
read-ethers
```
13. Set the `DHCP ranges` you want to use in the same `/etc/dnsmasq.conf` file. Example with networks `192.168.56.0/24` and `172.16.13.0/24`:
```bash
# Uncomment this to enable the integrated DHCP server, you need
# to supply the range of addresses available for lease and optionally
# a lease time. If you have more than one network, you will need to
# repeat this for each network on which you want to supply DHCP
# service.
dhcp-range=192.168.56.50,192.168.56.100,6h
dhcp-range=172.16.13.50,172.16.13.100,6h
```
14. Restart the `dnsmasq` service with that command:
```bash
service dnsmasq restart
```
### Routing
15. Enable the **`forwarding`** from `sysctl`: open `/etc/sysctl.conf` with your text editor and uncomment the following line (removing the leading `#` character):
```bash
net.ipv4.ip_forward=1
```
#### Setting the `iptables` rules
16. To set the `iptables` rules, you need to have clear which connections you want to allow, depending on the services present in your networks. Here is an example using a `WebServer` and a `PostgreSQL Server` in two different `LAN` networks.
> `"$WAN"`, `"$LAN1"` and `"$LAN2"` correspond to the network interfaces of `router`.
>
> `"$WEB_SERVER"` and `"$PSQL_SERVER"` correspond to `IP` addresses belonging to a `WebServer` and a `PostgreSQL Server`.
```bash
# INPUT policy
# accept all related or already established connections
iptables -A INPUT -m state --state RELATED,ESTABLISHED -j ACCEPT
# accept HTTP requests from the WAN interface
iptables -A INPUT -i "$WAN" -p tcp -m tcp --dport 80 -j ACCEPT
# accept SSH connections from any interface
iptables -A INPUT -p tcp -m tcp --dport 22 -j ACCEPT
# accept rsyslog tcp connections from LAN1 & LAN2 interfaces
iptables -A INPUT -i "$LAN1" -p tcp -m tpc --dport 514 -j ACCEPT
iptables -A INPUT -i "$LAN2" -p tcp -m tpc --dport 514 -j ACCEPT
# accept DNS requests from LAN1 & LAN2 interfaces
iptables -A INPUT -i "$LAN1" -p udp -m udp --dport 53 -j ACCEPT
iptables -A INPUT -i "$LAN2" -p udp -m udp --dport 53 -j ACCEPT
# accept DHCP requests from LAN1 & LAN2 interfaces
iptables -A INPUT -i "$LAN1" -p udp -m udp --dport 67 -j ACCEPT
iptables -A INPUT -i "$LAN2" -p udp -m udp --dport 67 -j ACCEPT
# FORWARD policy
# Forward policy set to DROP
iptables --policy FORWARD DROP
# allow related or already established connections
iptables -A FORWARD -m state --state RELATED,ESTABLISHED -j ACCEPT
# allow forwarding from WAN to LAN1 (if LAN1 needs connections from outside, like a webserver)
iptables -A FORWARD -i "$WAN" -o "$LAN1" -j ACCEPT
# allow forwarding from LAN1 & LAN2 to WAN (to have access to internet from the LANs networks)
iptables -A FORWARD -i "$LAN1" -o "$WAN" -j ACCEPT
iptables -A FORWARD -i "$LAN2" -o "$WAN" -j ACCEPT
# allow all ICMP requests from any interface
iptables -A FORWARD -p icmp -j ACCEPT
# allow a specific connection to an IP address in a particular port (example with a PSQL Server)
iptables -A FORWARD -d "$PSQL_SERVER"/32 -p tcp -m tcp --dport 5432 -j ACCEPT
# NAT policy
# enable HTTP DNAT from WAN to a specific IP address (example with a WebServer)
iptables -t nat -A PREROUTING -i "$WAN" -p tcp -m tcp --dport 80 -j DNAT --to-destination "$WEB_SERVER"
# enable NAT from the LANs networks to the WAN network
# necessary to have internet connection working in the LANs networks
iptables -t nat -A POSTROUTING -o "$WAN" -j MASQUERADE
```
#### Making the rules persistent
17. Save the configuration to make it persistent with the following command:
```bash
iptables-save > /etc/iptables/rules.v4
```
### Logging
18. Enable the `rsyslog` `tcp reception` in the `/etc/rsyslog.conf` file. Open the file in your text editor and uncomment the following lines removing the leading `#` character:
```bash
module(load="imtcp")
input(type="imtcp" port="514")
```
19. Disable the default `rsyslog` output file to use a template in the same `/etc/rsyslog.conf` file:
- Comment the last line of the following part
```bash
#
# Log anything besides private authentication messages to a single log file
#
#*.*;auth,authpriv.none -/var/log/syslog
```
- Add the following lines at the end of the file:
```bash
#
# Remote logs
#
template(name="RemoteLogs" type="string" string="/var/log/remote/%HOSTNAME%.log")
*.* ?RemoteLogs
```
20. Configure `logrotate`:
- Modify the `/etc/logrotate.conf` to enable the `dateext` option (to use the date in the names of the log files) and uncomment the following line:
```bash
dateext
```
- Create a new file `/etc/logrotate.d/remote` with the following content:
```bash
/var/log/remote/*.log {
weekly
rotate 52
compress
delaycompress
missingok
dateext
dateformat .%Y-%m-%d
sharedscripts
postrotate
/usr/lib/rsyslog/rsyslog-rotate
endscript
}
```
- Then restart the two services:
```bash
service rsyslog restart
service logrotate restart
```
### End
21. To be sure to have all configurations taken into account, `reboot` the `router` using that command:
```bash
reboot
```