Linux CLI tips
- Wifi connection
- Grub2 complete explanation
- My grub2 config
- Swap Ctrl-Left and Alt-Left on your keyboard
- BTRFS snapshots with snapper
- Create Services in Alpine Linux
- Almalinux LXC setup
- Create/extend SWAP using LVM
- Almalinux install nodejs 22
- Running chronyd on Almalinux LXC (Proxmox)
- Create system user with custom home directory
- What's different between Ctrl+Z and Ctrl+C in Unix command line
- Change LXC from unprivileged to privileged
- Accès aux installations de linux après réactivation du secure boot
Wifi connection
Configure WiFi Connections
This articles comes from here.
This section explains how to establish a WiFi connection. It covers creating and modifying connections as well as directly connecting.
Establish a Wireless Connection
This section will show how to establish a wifi connection to the wireless network. Note that directly connecting will implicitly create a connection (that can be seen with “nmcli c”). The naming of such will follow “SSID N” pattern, where N is a number.
First, determine the name of the WiFi interface:
$ nmcli d
DEVICE             TYPE      STATE         CONNECTION
...
wlan0              wifi      disconnected     --
Make sure the WiFi radio is on (which is its default state):
$ nmcli r wifi on
Then, list the available WiFi networks:
$ nmcli d wifi list
*  SSID           MODE   CHAN  RATE       SIGNAL  BARS  SECURITY
   ...
   my_wifi      Infra  5     54 Mbit/s  89      ▂▄▆█  WPA2
As an example, to connect to the access point ‘my_wifi’, you would use the following command:
$ nmcli d wifi connect my_wifi password <password>
is the password for the connection which needs to have 8-63 characters or 64 hexadecimal characters to specify a full 256-bit key.
Connect to a Hidden Network
Issue the following command to create a connection associated with a hidden network :
$ nmcli c add type wifi con-name <name> ifname wlan0 ssid <ssid>
$ nmcli c modify <name> wifi-sec.key-mgmt wpa-psk wifi-sec.psk <password>
Now you can establish a connection by typing:
$ nmcli c up <name>
is an arbitrary name given to the connection and is the password to the network. It needs to have between 8-63 characters or 64 hexadecimal characters in order to specify a full 256-bit key.
Further Information
You will find further information and more detailed examples on following page:
Grub2 complete explanation
Tutoriel trouvé sur cette page
Table des matières
Tutoriel GRUB 2 : paramétrage manuel
Il existe des applications graphiques pour paramétrer Grub. Ici on exposera l'intervention directe sur les fichiers de paramètres de Grub.
A savoir avant de configurer
Nous n'intervenons pas directement sur un fichier de configuration mais sur des fichiers de paramètres qui sont pris en compte uniquement lors du lancement d'une commande de mise à jour (update-grub).
Les paramétrages sont situés uniquement dans le fichier /etc/default/grub et dans le dossier /etc/grub.d/.
Fichier grub.cfg
- /boot/grub/grub.cfg : est un fichier de configuration généré automatiquement par update-grub (il est inutile d’éditer ce fichier) et ne doit donc pas être modifié manuellement.
Fichier /etc/default/grub
Dans ce fichier, on peut activer ou désactiver un paramètre en le commentant / décommentant avec le caractère dièse « # »(croisillon).
paramètres présents par défaut
- GRUB_DEFAULT=0 correspond au menu qui sera sélectionné par défaut. (→ Détails)
- #GRUB_HIDDEN_TIMEOUT=0 : avec le « # », le menu de grub sera visible. Sans le « # », le menu de grub sera invisible. (→ Détails)
- GRUB_HIDDEN_TIMEOUT_QUIET=false De pair avec ‘GRUB_HIDDEN_TIMEOUT’. (→ Détails)
- GRUB_TIMEOUT_STYLE=hidden Paramètre apparu avec la version 18.04.1 en remplacement des deux qui précèdent.
- GRUB_TIMEOUT=10 est la durée en secondes de l’affichage du menu avant de se lancer sur le menu sélectionné par défaut. (→ Détails)
- GRUB_DISTRIBUTOR=`` est la ligne qui définit la syntaxe des titres du menu (→ Détails)
- GRUB_CMDLINE_LINUX_DEFAULT=" " Des paramètres sont déjà présents, ils peuvent être ôtés. On y met les paramètres à ajouter lors de la détection automatique des systèmes lors du démarrage. (ex: radeon.modeset=1 logo.nologo ..).
- GRUB_CMDLINE_LINUX="" On peut y mettre des paramètres supplémentaires à ceux du paramètre précédant à ajouter lors du démarrage des systèmes en mode recovery (ex: fsck.mode=force fsck.repair=yes …).
- #GRUB_GFXMODE=640x480 (→ Détails).
- #GRUB_INIT_TUNE="480 440 1" : sans le « # », on aura un bip à l’affichage du menu Grub.
paramètres qu'on peut ajouter
- GRUB_GFXPAYLOAD=1024x768 : définit la résolution d’affichage entre Grub et celle définie dans la distribution (pour le splash screen par exemple). Défini à 'keep' par défaut.
- GRUB_GFXPAYLOAD_LINUX=auto : définit la résolution d’affichage par défaut du linux lancé

- GRUB_BACKGROUND="/boot/grub/images/fjord.jpg" : pour mettre une image en fond d'écran (→ Détails)
- GRUB_DISABLE_OS_PROBER="true" : si on souhaite désactiver la recherche d'autres systèmes à chaque update-grub (inutile si on les lance autrement)
- GRUB_DISABLE_OS_PROBER=false : si on souhaite activer la recherche d'autres systèmes à chaque update-grub pour les lancer.avec le grub
- GRUB_OS_PROBER_SKIP_LIST="…" : liste de partitions à ne pas inclure dans la recherche automatique de systèmes. (→ Détails)
- GRUB_DISABLE_LINUX_RECOVERY="true" : on mettra ce paramètre si on ne veut plus avoir la possibilité de lancer les systèmes en mode 'maintenance'
- GRUB_DISABLE_SUBMENU=y : si on souhaite voir directement une entrée de menu par noyau linux disponible (On peut supprimer les noyaux les plus anciens → Nettoyer Ubuntu)
- LANG=fr_FR : pour définir la langue utilisée pour l'édition du menu depuis Grub ou le mode 'ligne de commande'
- GRUB_TERMINAL_INPUT=at_keyboard : nécessaire pour paramétrer le clavier français (pour ne plus avoir à chercher les ()[]= .. du clavier Qwerty). (→ Détails)
- GRUB_THEME="/boot/grub/themes/ubuntu-mate/theme.txt" : chemin vers le fichier de configuration du thème (mode graphique). (→ Détails)
Dossier /etc/grub.d/
Ce dossier contient tous les scripts qui seront utilisés (en respectant l'ordre de numérotation) par update-grub pour créer le fichier grub.cfg.
- 00_header : script gérant les paramètres définis dans /etc/default/grub ;
- 05_debian_theme : script pour gérer le thème en mode texte (fonds d'écran et couleurs) ;
- 10_linux : contient le script de lancement du système sur lequel on est ;
- 20_memtest86+ : script permettant de générer les entrées memtest ; semble absent de certaines installations EFI
- 20_linux_xen : script pour Xen Linux et Xen Hypervisor ;
- 30_os-prober : contient le script de recherche des autres systèmes installés ;
- 30_uefi-firmware : script pour localiser les paramètres uefi de l'ordinateur ;
- 40_custom : configuration personnelle (systèmes à lancer en configuration manuelle, paramètres qui n'existent pas pour /etc/default/grub,..)
- 41_custom : identique à 40_custom (si on le renomme par exemple 07_custom, on pourra y mettre le lancement du mediacenter ou de Windows en premier sur la liste)
Nous n'utiliserons pour nos paramétrages que les fichiers 'custom'.
Paramétrage manuel
- de créer une sauvegarde (ex. : sudo cp /boot/grub/grub.cfg /boot/grub/grub.cfg.autogénéré) ;
De même, aucun script de configuration présent dans /etc/grub.d/ ne doit être effacé.
Par exemple, pour ne pas détecter les autres OS, il est préférable d'utiliser le paramètre GRUB_DISABLE_OS_PROBER="true" de /etc/default/grub.
Pour tous nos paramétrages, on éditera, avec les droits d’administration, quasi exclusivement les fichiers /etc/default/grub et /etc/grub.d/40_custom.
Une fois toutes les modifications opérées, on lancera la commande de mise à jour :
sudo update-grub
Afficher/Masquer le menu
Pour afficher ou non le menu Grub, on utilisera les paramètres GRUB_HIDDEN_TIMEOUT et GRUB_HIDDEN_TIMEOUT_QUIET du fichier /etc/default/grub.
cas 1
Caché sans attendre le choix
Remarque : avec GRUB_HIDDEN_TIMEOUT_QUIET=true, impossible de mettre en pause le démarrage en tapotant la touche Shift lors de l'affichage du menu.
Pour Ubuntu 16.04 :
GRUB_HIDDEN_TIMEOUT=0
GRUB_HIDDEN_TIMEOUT_QUIET=true
GRUB_TIMEOUT=0	# dépendance: lorsque GRUB_HIDDEN_TIMEOUT est actif, ce paramètre doit être défini à 0
À partir d'Ubuntu 18.04 :
GRUB_TIMEOUT_STYLE=hidden
GRUB_TIMEOUT=0
cas 2
Caché avec un décompte de 5 secondes pendant lequel on peut appuyer sur les touches Échap ou majuscule (Shift) pour afficher le menu. Sans action de notre part, le choix par défaut est lancé.
Remarque : puisque GRUB_HIDDEN_TIMEOUT_QUIET=false, alors on peux mettre en pause le démarrage en tapotant la touche Shift pour afficher le menu.
Pour Ubuntu 16.04 :
GRUB_HIDDEN_TIMEOUT=5
GRUB_HIDDEN_TIMEOUT_QUIET=false
GRUB_TIMEOUT=0	# dépendance: lorsque GRUB_HIDDEN_TIMEOUT est actif, ce paramètre doit être défini à 0
À partir d'Ubuntu 18.04 :
GRUB_TIMEOUT_STYLE=hidden
GRUB_TIMEOUT=5
cas 3
Affiché directement avec un décompte de 10s.
Pour Ubuntu 16.04 :
#GRUB_HIDDEN_TIMEOUT=0
GRUB_HIDDEN_TIMEOUT_QUIET=true
GRUB_TIMEOUT=10	# ne pas laisser à zéro si vous voulez avoir le temps de sélectionner éventuellement un autre système.
À partir d'Ubuntu 18.04 :
GRUB_TIMEOUT_STYLE=menu
GRUB_TIMEOUT=10
Intitulé dans le menu
Par défaut, la ligne du menu grub concernant la distribution sur laquelle vous êtes affiche « Ubuntu GNU/Linux ». Que vous soyez sur une variante (Xubuntu, Lubuntu, Kubuntu,..) ou sur un dérivé (Linux Mint,..), l'intitulé reste le même car il dépend de la commande 'lsb_release'.
Voici comment on peut influencer ce comportement en modifiant le paramètre GRUB_DISTRIBUTOR du fichier /etc/default/grub selon les possibilités suivantes :
GRUB_DISTRIBUTOR=`lsb_release -is 2> /dev/null || echo Debian`					# donne : Ubuntu GNU/Linux
GRUB_DISTRIBUTOR=`lsb_release -ds 2> /dev/null || echo Debian`					# donne : Ubuntu 16.04.1 LTS GNU/Linux
GRUB_DISTRIBUTOR=`echo -n $(lsb_release -cds 2> /dev/null || echo Debian)`			# donne : Ubuntu 16.04.1 LTS xenial GNU/Linux
GRUB_DISTRIBUTOR=`echo -n TITRE PERSONNALISÉ $(lsb_release -rs 2> /dev/null || echo Debian)`	# donne : TITRE PERSONNALISÉ 16.04 GNU/Linux
GRUB_DISTRIBUTOR=`echo -n TITRE PERSONNALISÉ`							# donne : TITRE PERSONNALISÉ GNU/Linux
Menu par défaut
On utilisera ici les paramètres GRUB_DEFAULT et GRUB_TIMEOUT du fichier /etc/default/grub
Pour changer le système d'exploitation sur lequel grub démarre par défaut on paramètrera GRUB_DEFAULT= au choix avec :
- un chiffre donnant la position de la ligne à sélectionner dans la liste.(0 = le premier, 1 = le deuxième, etc.) ;
- saved (sans guillemet) pour ce qui a été sélectionné lors du précédent lancement (nécessite de rajouter GRUB_SAVEDEFAULT=true) ;
- ou le titre de menu exact d’un menu mis entre guillemets (par exemple : "Microsoft Windows 10 (on /dev/sda1)"). Pour obtenir les titres exacts des menus : grep menuentry /boot/grub/grub.cfg ;
- ou le titre du menu avancé et le titre exact du sous-menu séparés par le caractère >. Le tout mis entre guillemets. Par exemple: GRUB_DEFAULT="Options avancées pour Ubuntu>Ubuntu, avec Linux 4.15.0-176-generic"
- "chiffre>chiffre" le premier chiffre décrit un menu principal, le second chiffre décrit le sous-menu (Numérotation à partir de 0) . Ils doivent aussi être mis entre guillemets. Par exemple "1>2" pour le mode normal de l'ancien noyau.
La temporisation avant un lancement automatique se définit avec le paramètre GRUB_TIMEOUT :
- GRUB_TIMEOUT=10, lancera le système par défaut au bout de 10 secondes. Si on ne veut pas de temporisation, on mettra : GRUB_TIMEOUT=-1
Désactiver Memtest
Si on ne souhaite plus voir dans les menus Memtest, on changera le statut du script pour qu'il ne soit plus exécutable à la prochaine commande de mise à jour :
sudo chmod -x /etc/grub.d/20_memtest86+
Pour le réactiver, on mettra '+x' au lieu de '-x' avec la même commande.
os-prober partiel
On peut demander à grub d'éviter de scanner certaines partitions par leur UUID (sudo blkid pour avoir leur liste). On utilisera le paramètre GRUB_OS_PROBER_SKIP_LIST du fichier /etc/default/grub :
GRUB_OS_PROBER_SKIP_LIST="3a43c682-cb67-47e6-83cf-e647a72abb5d@/dev/sda3","1397cb72-27f1-4e01-acaf-86495341c71d@/dev/sda4"
Attention : Il semble que la bonne syntaxe soit :
GRUB_OS_PROBER_SKIP_LIST="3a43c682-cb67-47e6-83cf-e647a72abb5d@/dev/sda3 1397cb72-27f1-4e01-acaf-86495341c71d@/dev/sda4"
Changer l'ordre des menus
On peut renommer les scripts utilisés par 'update-grub' dans le dossier /etc/grub.d/ pour en changer l'ordre, par exemple :
- sudo mv /etc/grub.d/30_os-prober /etc/grub.d/06_os-prober (par exemple pour mettre Windows en premier sur le menu)
On peut copier les entrées des menus dans 40_custom (depuis /boot/grub/grub.cfg) dans l'ordre qu'on souhaite et désactiver la détection automatique en mettant le paramètre GRUB_DISABLE_OS_PROBER="true" dans /etc/default/grub. On peut renommer 41_custom en 07_custom pour qu'il se place avant 10_linux (on y mettra le menu qu'on veut en premier).
Clavier français
Quand on édite un menu, c'est galère de retrouver la ponctuation, les parenthèses ou encore le signe égal sur un clavier qwerty. La solution est de paramétrer la disposition azerty :
- testé avec le clavier 'Français (variante)' actif. On commencera par créer le dossier /boot/grub/layouts. Ensuite, on générera la disposition du clavier dans un fichier reconnu par grub :
sudo mkdir /boot/grub/layouts
sudo grub-kbdcomp -o /boot/grub/layouts/fr.gkb fr
- On ajoutera le paramètre GRUB_TERMINAL_INPUT=at_keyboard au fichier /etc/default/grub
- On ajoutera ces lignes au fichier /etc/grub.d/40_custom :
# Clavier fr
insmod keylayouts
keymap fr
Booter en automatique comme le choix précédent.
GRUB_DEFAULT=saved
GRUB_SAVEDEFAULT=true
Ne pas installer la structure de boot.
Ceci est un ajout du 15/08/2017 dont le contenu demande encore à être confirmé. Lorsqu'on dispose de plusieurs OS ubuntu et qu'on passe souvent de l'un à l'autre et que les noyaux se mettent à jour, on arrive rapidement à avoir un énorme fichier boot.cfg. Afin de l'épurer, il existe un outil
L'idéal étant de ne pas arriver à cette situation. Il existe quelques palliatifs pour retarder cet état de fait. Pour tous les OS qui ne sont pas l'OS dirigeant (souvent la version LTS):
IL faut demander à ne faire aucune recherche d'OS complémentaires via la commande
<code>sudo chmod -x /etc/grub.d/30_os-prober</code>
il est preferable de modifier le fichier "/etc/default/grub " et d' y inserer l ' option apropriée :
GRUB_DISABLE_OS_PROBER=true
Il faut aussi ne pas ré-écraser le démarrage du boot prioritaire. Ce qui se fait à chaque fois qu'un nouveau noyau arrive. Je n'ai pas vu d'option dans ce fichier de paramétrage pour le faire. En attendant:
sudo chmod -x /usr/sbin/grub-install
Contenu de menu perso
Tous ces contenus sont ajoutés à /etc/grub.d/40_custom
Chaîner un autre menu
chainloader vous permettra de lancer un autre gestionnaire d’amorçage présent sur le premier secteur des partitions concernées : Windows, Lilo…. Ça ne fonctionne pas toujours bien donc on préfère souvent une autre alternative. Voici quelques exemples.
Remarque : l’entête du fichier 40_custom doit comporter ces lignes :
#!/bin/sh
exec tail -n +3 $0
menuentry "Windows 10" {
  insmod ntfs
  search --set=root --label WINDOWS_10 --hint hd0,msdos2
  ntldr /bootmgr
}
menuentry "Windows 10b" {
  insmod ntfs
  search --set=root --label WINDOWS_10b --hint hd0,msdos2
  ntldr /bootmgr
}
menuentry "Windows 7" {
  insmod ntfs
  set root='(hd0,3)'
  search --no-floppy --fs-uuid --set 94E84428E8440B46
  chainloader +1
}
menuentry "Windows 10 en mode bios legacy" {
  insmod ntfs
  set root='(hd1,msdos2)'
  chainloader +1
}
menuentry 'Bootloader Lilo sur sda7' {
  set root=(hd0,7)
  chainloader +1
}
menuentry "Menu grub2 sur sda8" {
  set root=(hd0,8)
  configfile /boot/grub/grub.cfg
}
menuentry "Menu grub-legacy sur sda6" {
  set root=(hd0,6)
  legacy_configfile /boot/grub/menu.lst
}
Aérer le menu
Pour ajouter des lignes vides, de sous-titres,.. on procédera ainsi avec juste un 'true' pour qu'elles soient prises en compte :
## ligne vide
menuentry "   " {
	true
}
## ligne de sous-titre
menuentry "-------------------     Dérivés Ubuntu     -------------------" {
	true
}
Ancien paramètre vga=xxx
Dans les options de boot d’un Linux, on trouve parfois le paramètre « vga=788 » avec une définition d’écran donné. Consultez ce tableau pour pouvoir ajouter un 'set gfxpayload' équivalent dans votre 'menuentry'.
Donc, par exemple, au lieu de vga=788 dans la ligne 'linux', on ajoutera au-dessus une ligne set gfxpayload=800x600 à la place.
Menus pour lancer des images iso
Dans ce tutoriel vous aurez des exemples de menus « prêts à l'emploi » pour lancer les livecd Ubuntu ou autres depuis leur fichier iso :
Menu Arrêt du système
menuentry 'Arrêt du système' {
	halt
}
menuentry 'Redémarrage du système' {
	reboot
}
mise à jour
Comme toujours, après tous ces paramétrages, on lancera la commande de mise à jour :
sudo update-grub
Habillage (mode texte)
Résolution d'affichage
vbeinfo
Quand on est sur le menu grub, on appuie sur « c ». On est ainsi en ligne de commande. On lancera alors la commande :
vbeinfo
Toutes les résolutions supportées par grub s'affichent. La plus haute est la dernière sur la liste. On la note (par exemple: 1280x1024x32)
GRUB_GFXMODE
Sur le fichier /etc/default/grub, on modifiera le paramètre GRUB_GFXMODE qui définit la résolution d'affichage pour Grub ainsi (sans « # » devant) :
GRUB_GFXMODE=1280x1024,1024x768x32
La deuxième valeur sera prise en compte si la première n’est pas supportée par votre matériel. Le x32 est la profondeur de codage des couleurs en bits.
Si le démarrage se bloque sur un écran noir ou sur l'image de fond, appuyez sur 'c' pour passer en ligne de commande et saisissez, par exemple :
set gfxpayload=1024x768
GRUB_GFXPAYLOAD
On fera la même chose qu'au paragraphe précédent pour les résolutions après Grub avec les paramètres GRUB_GFXPAYLOAD et GRUB_GFXPAYLOAD_LINUX.
Fond d'écran
Pré-requis
- GRUB_GFXMODE doit être défini (→ voir plus haut)
- une image dans un format compatible avec la capacité d'affichage de grub (→ voir plus haut)
Convertir l'image
Si vous avez Gimp d'installé ou au moins ImageMagick, vous pourrez lancer cette commande de conversion en l'adaptant à vos besoins :
convert ~/Images/"image exemple.jpg" -resize 1280x1024! -depth 16 ~/Bureau/"00_image_de_fond.jpg"
sudo mv ~/Bureau/"00_image_de_fond.jpg" /boot/grub/.
Utilisation
Pour l'utiliser, on ajoutera le paramètre GRUB_BACKGROUND au fichier /etc/default/grub
GRUB_BACKGROUND="/boot/grub/00_image_de_fond.jpg"
Lancer ensuite la commande de mise à jour :
sudo update-grub
Si le fond d'écran n'est pas détecté lors de cette mise à jour, c'est qu'il n'est pas dans un format compatible pour Grub.
Couleurs d'affichage
Pour définir les couleurs utilisées par grub, on ajoutera au fichier /etc/grub.d/40_custom les lignes suivantes :
set color_normal=light-gray/black		# définit les couleurs de texte/fond d'écran autour du cadre de menu
set menu_color_normal=light-gray/black		# définit les couleurs de texte/fond d'écran dans le cadre de menu
set menu_color_highlight=yellow/light-blue	# définit les couleurs de texte/surbrillance pour la ligne de menu sélectionnée
Les couleurs à notre disposition sont : black, blue, brown, cyan, dark-gray, green, light-cyan, light-blue, light-green, light-gray, light-magenta, light-red, magenta, red, white, yellow. 'black' devient une couleur transparente si on a une image de fond.
Lancer ensuite la commande de mise à jour :
sudo update-grub
THEME
On peut tester sa compatibilité en la définissant comme fond d'écran (→ voir plus haut) et en regardant si elle est détectée par la commande de mise à jour.
Sources
On peut installer le theme inclus dans les dépots : grub2-themes-ubuntu-mate. On en trouve aussi ici (en cherchant bien 'themes Grub2' et non pas seulement 'gfx')
Où sont-ils installés ?
Par défaut, ils sont installés dans le dossier /boot/grub/themes.
Activation
Dans le fichier /etc/default/grub, on renseignera le paramètre GRUB_THEME ainsi :
GRUB_THEME="/boot/grub/themes/ubuntu-mate/theme.txt"
Il s'agit du chemin vers le fichier de configuration. Il peut très bien porter un autre nom (par exemple theme-fr.txt sur un autre theme).
Lancer ensuite la commande de mise à jour :
sudo update-grub
Autres pages en rapport
Contributeurs : Frombenny (rédaction de la page), Theozzfancometh, f.x0, albanmartel, perco, floxyz51.
My grub2 config
Enable OS prober
If os-prober is disabled, add this line in /etc/default/grub:
GRUB_DISABLE_OS_PROBER=false
Add poweroff and reboot options
To add poweroff and reboot options to your grub, add those lines in /etc/grub.d/40_custom:
menuentry 'Power off' {
	halt
}
menuentry 'Reboot' {
	reboot
}
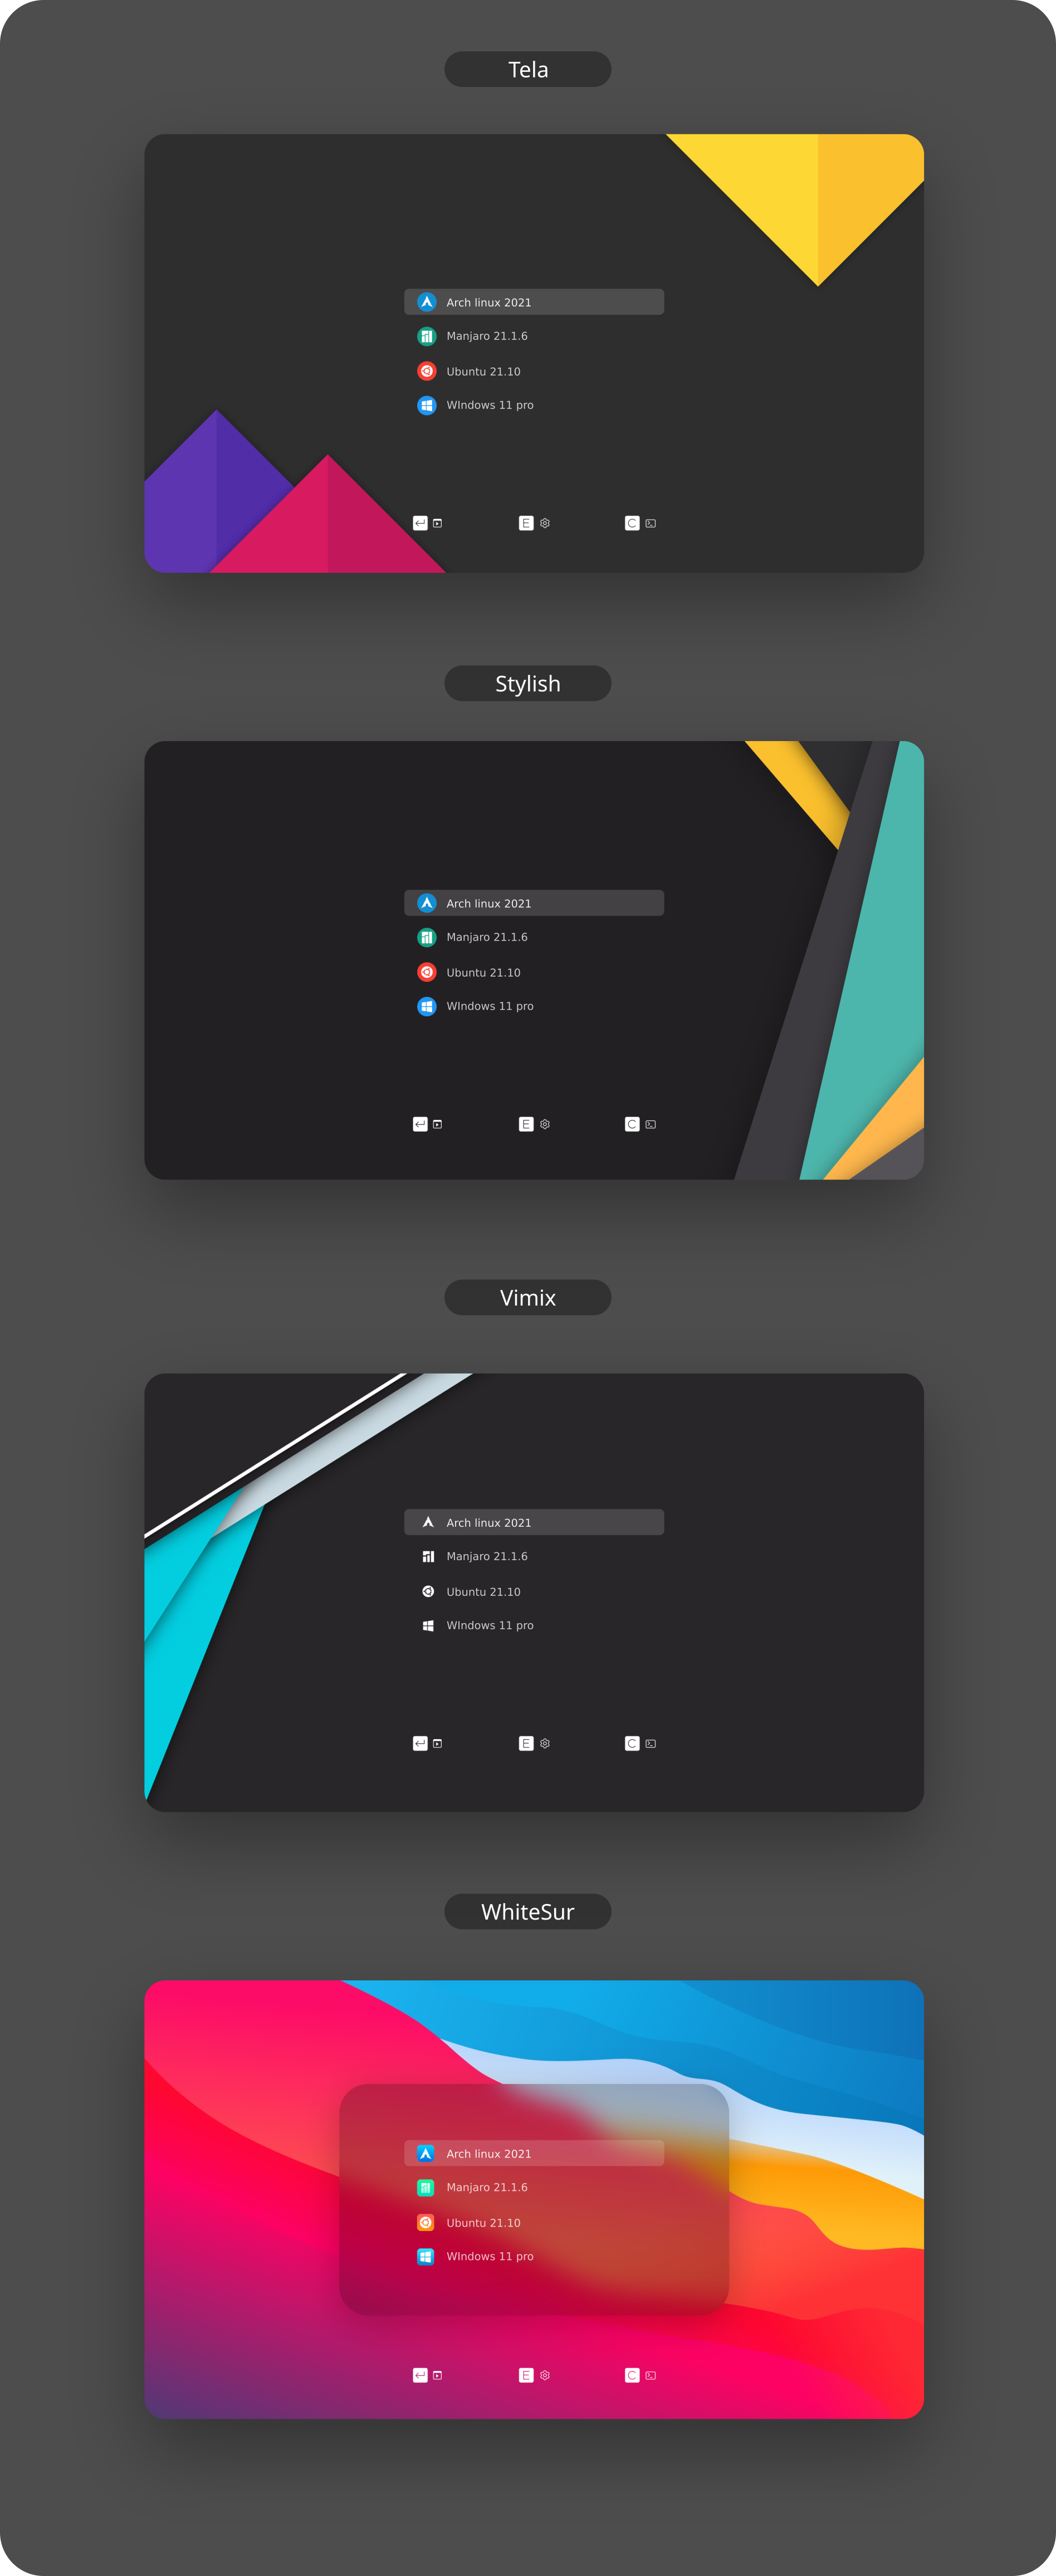
Install a theme (link to the github repo)

Installation:
Usage: sudo ./install.sh [OPTIONS...]
  -t, --theme                 theme variant(s)          [tela|vimix|stylish|whitesur]       (default is tela)
  -i, --icon                  icon variant(s)           [color|white|whitesur]              (default is color)
  -s, --screen                screen display variant(s) [1080p|2k|4k|ultrawide|ultrawide2k] (default is 1080p)
  -c, --custom-resolution     set custom resolution     (e.g., 1600x900)                    (disabled in default)
  -r, --remove                remove theme              [tela|vimix|stylish|whitesur]       (must add theme name option, default is tela)

  -b, --boot                  install theme into '/boot/grub' or '/boot/grub2'
  -g, --generate              do not install but generate theme into chosen directory       (must add your directory)

  -h, --help                  show this help
If no options are used, a user interface dialog will show up instead
Examples:
- Install Tela theme on 2k display device:
sudo ./install.sh -t tela -s 2k
- Install Tela theme with custom resolution:
sudo ./install.sh -t tela -c 1600x900
- Install Tela theme into /boot/grub/themes:
sudo ./install.sh -b -t tela
- Uninstall Tela theme:
sudo ./install.sh -r -t tela
Issues / tweaks:
Correcting display resolution:
- On the grub screen, press
cto enter the command line - Enter
vbeinfoorvideoinfoto check available resolutions - Open
/etc/default/grub, and editGRUB_GFXMODE=[height]x[width]x32to match your resolution - Finally, run
grub-mkconfig -o /boot/grub/grub.cfgto update your grub config
Setting a custom background:
- Make sure you have
imagemagickinstalled, or at least something that providesconvert - Find the resolution of your display, and make sure your background matches the resolution
- 1920x1080 >> 1080p
- 2560x1080 >> ultrawide
- 2560x1440 >> 2k
- 3440x1440 >> ultrawide2k
- 3840x2160 >> 4k
- Place your custom background inside the root of the project, and name it
background.jpg - Run the installer like normal, but with -s
[YOUR_RESOLUTION]and -t[THEME]and -i[ICON]- Make sure to replace
[YOUR_RESOLUTION]with your resolution and[THEME]with the theme
- Make sure to replace
- Alternatively, use the
-coption to set a custom resolution
Contributing:
- If you made changes to icons, or added a new one:
- Delete the existing icon, if there is one
- Run
cd assets; ./render-all.sh
- Create a pull request from your branch or fork
- If any issues occur, report then to the issue page
Preview:
Documents
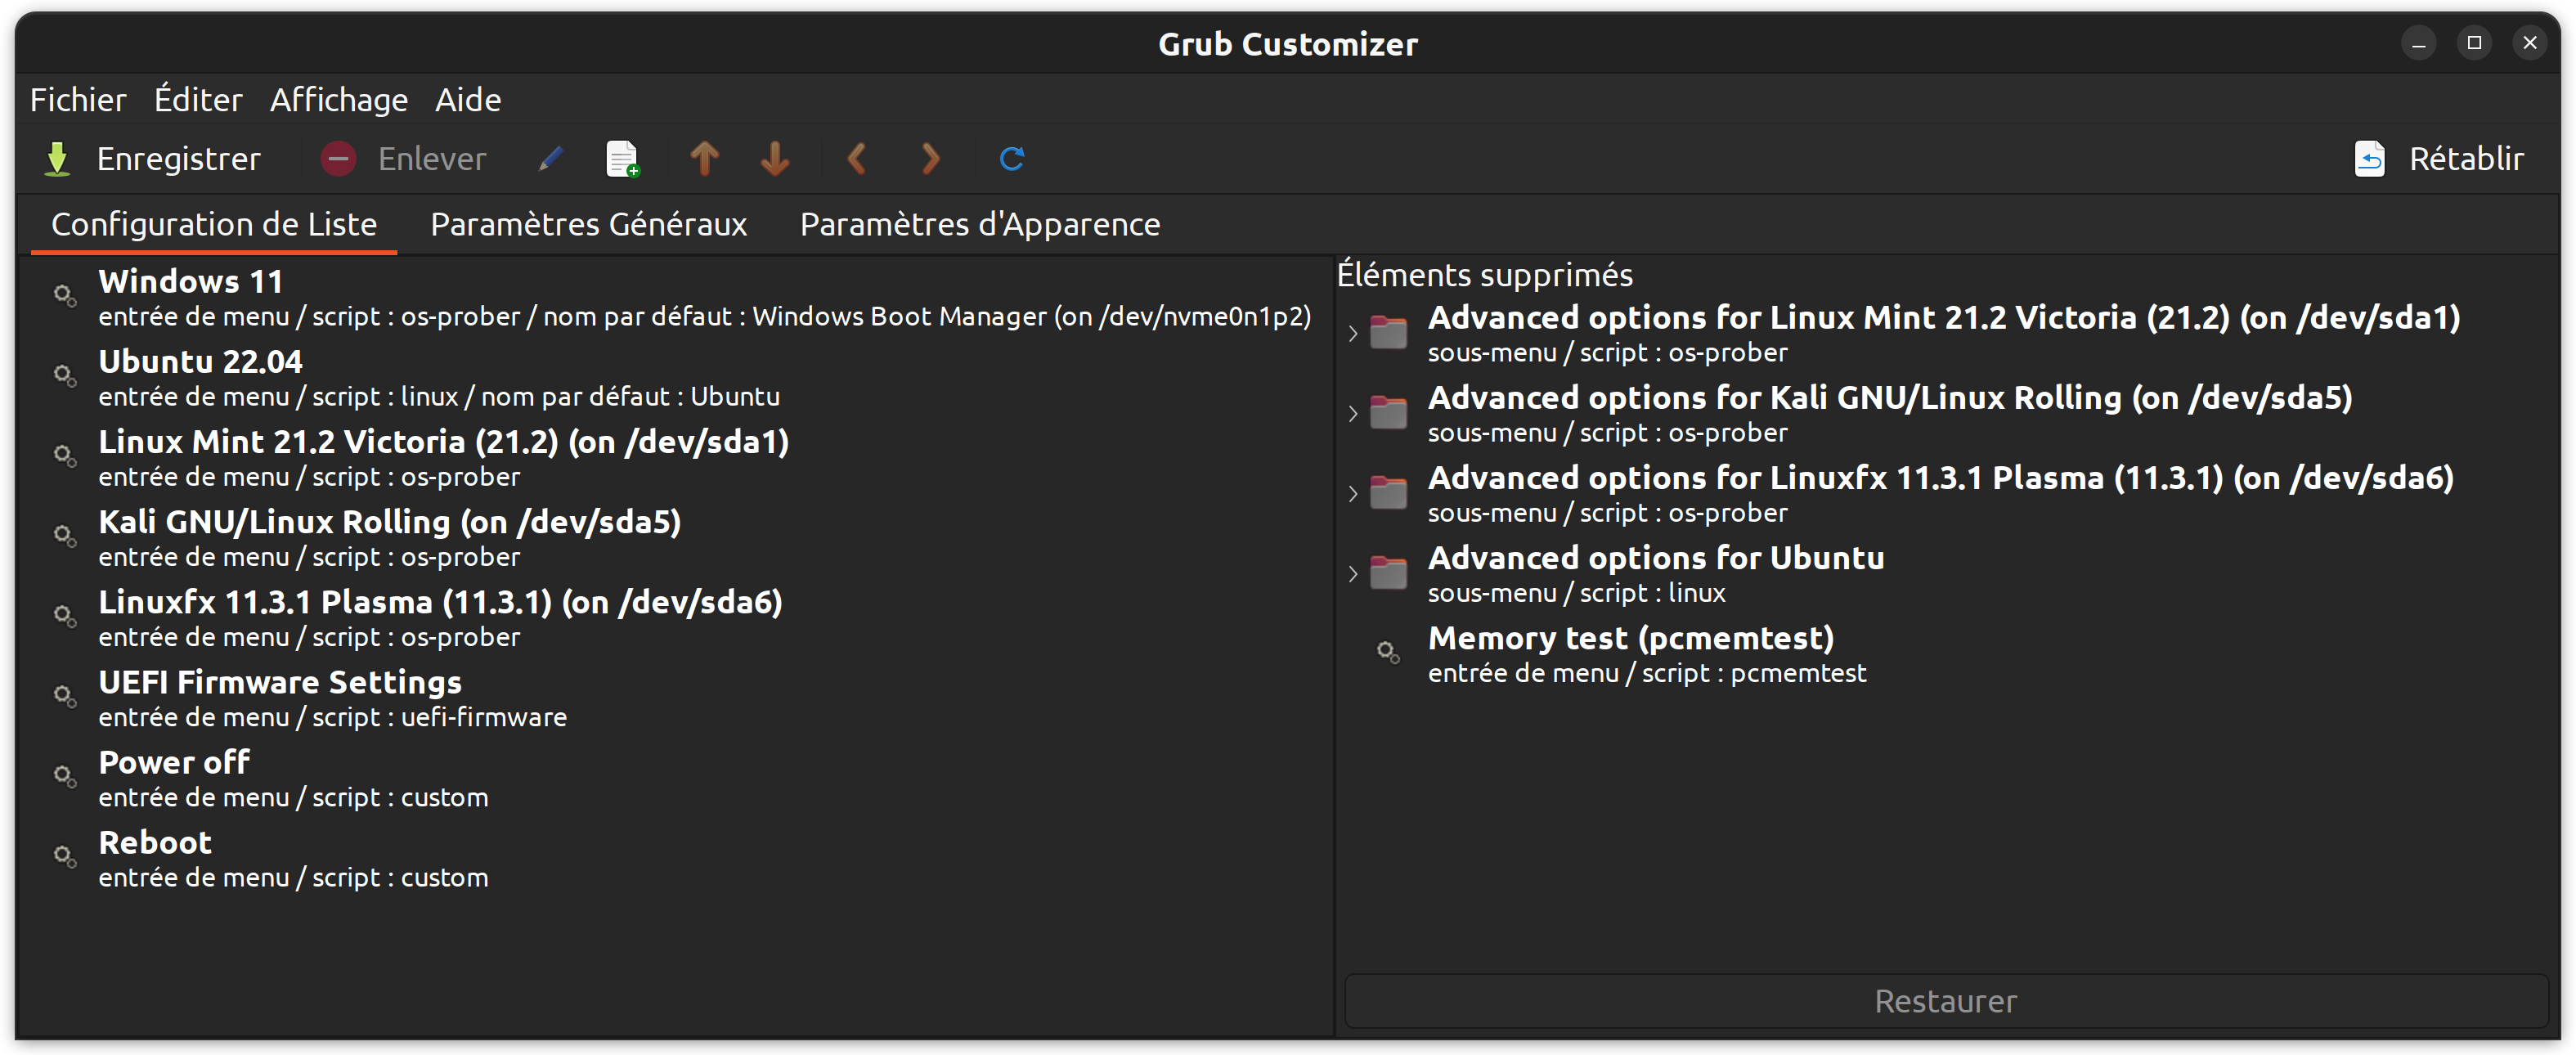
Customize the titles, order and entries shown with grub-customizer
To install grub-customizer:
sudo add-apt-repository ppa:danielrichter2007/grub-customizer
sudo apt-get update
sudo apt-get install grub-customizer
Preview:
Swap Ctrl-Left and Alt-Left on your keyboard
Introduction
I know, not everyone is a fan of Apple, but I enjoyed quite a bit the UX of my old MacBook Pro, so I always swap the left Ctrl key with the left Alt key, like the Command key and Option key from Apple.
The thing I liked about that is the simplicity of using the Ctrl shortcuts with the thumb without moving the left hand that much... a personal preference, but still enjoyable IMO.
But swapping keys is not always an easy task, because, if it only works partially, it may completely break your interactions and shortcuts... definitely not a good experience.
Configuration
The easiest and most compatible way I found is the following (it worked for me on Ubuntu and Archlinux):
- Open a terminal
- Type
nano ~/.Xmodmapand thenEnter(you can use whatever text editor you prefer: vi, vim, nvim, gedit...) - Type the following lines:
clear control clear mod1 keycode 37 = Alt_L Meta_L keycode 64 = Control_L add control = Control_L Control_R add mod1 = Alt_L Meta_L - Type
Ctrl-X, thenYand thenEnter(it may differ according to the text editor of your choice (Escape,:wqandEnterfor vi, vim and nvim). - Finally type
xmodmap ~/.Xmodmapto apply the new configuration.
If it doesn't work for you, it may be because of a couple of reasons:
- your keyboard is not mapped the same way (different keycodes)
- you don't have
xmodmap - another reason I don't know of...
If the reason is the first one, you may be interested to see that post (where I found that tip).
BTRFS snapshots with snapper
Picked from an article here.
Set up automatic snapshots of a BTRFS root subvolume, add these snapshots to the GRUB boot menu, and gain the ability to rollback an Arch Linux system to an earlier state.
Let's go!
See "A(rch) to Z(ram)" for my step-by-step install of Arch, where I created:
@subvolume, mounted to/. Create snapshots of this root subvolume.@snapshotsand other subvolumes, which are excluded from root snapshots.
1. Install Snapper and snap-pac
Snapper is a tool for managing BTRFS snapshots. It can create and restore snapshots, and provides scheduled auto-snapping. Snap-pac provides a Pacman hook that uses Snapper to create pre- and post- BTRFS snapshots triggered by use of the package manager.
Install ...
$ sudo pacman -S snapper snap-pac
2. Create snapshot configuration for root subvolume
Snapper's create-config command assumes:
- Subvolume
@already exists and is mounted at/. /.snapshotsdirectory is not mounted and doesn't exist.
During my Arch install, I created the @ and @snapshots subvolumes, and /.snapshots mountpoint. Before letting Snapper do its config thing, I need to move my earlier snapshot setup out of the way.
Unmount the subvolume and remove the mountpoint ...
$ sudo umount /.snapshots
$ sudo rm -rf /.snapshots
Create a new root config ...
$ sudo snapper -c root create-config /
This generates:
- Configuration file at
/etc/snapper/configs/root. - Add
roottoSNAPPER_CONFIGSin/etc/conf.d/snapper. - Subvolume
.snapshotswhere future snapshots for this configuration will be stored.
3. Setup /.snapshots
List subvolumes ...
$ sudo btrfs subvolume list /
ID 256 gen 199 top level 5 path @
ID 257 gen 186 top level 5 path @home
ID 258 gen 9 top level 5 path @snapshots
[...]
ID 265 gen 199 top level 256 path .snapshots
Note the @snapshots subvolume I had created earlier, and the .snapshots created by Snapper.
I prefer my @snapshots setup over .snapshots, so I delete the Snapper-generated subvolume ...
$ sudo btrfs subvolume delete .snapshots
Delete subvolume (no-commit): '//.snapshots'
Re-create and re-mount /.snapshots mountpoint ...
$ sudo mkdir /.snapshots
$ sudo mount -a
This setup will make all snapshots created by Snapper be stored outside of the @ subvolume. This allows replacing @ without losing the snapshots.
Set permissions. Owner must be root, and I allow members of wheel to browse through snapshots ...
$ sudo chmod 750 /.snapshots
$ sudo chown :wheel /.snapshots
4. Manual snapshot
Example of taking a manual snapshot of a fresh install ...
$ sudo snapper -c root create -d "**Base system install**"
It can also be done using btrfs without creating any snapper configuration. Here is an example of a snapshot of the home directory:
$ sudo btrfs subvolume snapshot -r /home "/.snapshots/home-$(date +%Y%m%d)" 5. Automatic timeline snapshots
Setup timed auto-snapshots by modifying /etc/snapper/configs/root.
Allow user (example: foo) to work with snapshots ...
ALLOW_USERS="foo"
Example: Set some timed snapshot limits ...
TIMELINE_MIN_AGE="1800"
TIMELINE_LIMIT_HOURLY="5"
TIMELINE_LIMIT_DAILY="7"
TIMELINE_LIMIT_WEEKLY="0"
TIMELINE_LIMIT_MONTHLY="0"
TIMELINE_LIMIT_YEARLY="0"
Start and enable snapper-timeline.timer to launch the automatic snapshot timeline, and snapper-cleanup.timer to periodically clean up older snapshots...
$ sudo systemctl enable --now snapper-timeline.timer
$ sudo systemctl enable --now snapper-cleanup.timer
6. Pacman snapshots
Pacman pre- and post- snapshots are triggered before and after a significant change (such as a system update).
Example: I install tree, which triggers a pre and post install snapshot.
List configs ...
$ snapper list-configs
Config | Subvolume
-------+----------
root   | /
List snapshots taken for root ...
$ snapper -c root list
 # | Type   | Pre # | Date                        | User | Cleanup  | Description             | Userdata
---+--------+-------+-----------------------------+------+----------+-------------------------+---------
0  | single |       |                             | root |          | current                 |
1  | single |       | Sat 20 Aug 2022 11:21:53 AM | root |          | **Base system install** |
2  | pre    |       | Sat 20 Aug 2022 11:22:39 AM | root | number   | pacman -S tree          |
3  | post   |     2 | Sat 20 Aug 2022 11:22:39 AM | root | number   | tree                    |
4  | single |       | Sat 20 Aug 2022 12:00:04 PM | root | timeline | timeline                |
List updated subvolumes list, which now includes the snapshots ...
$ sudo btrfs subvolume list /
ID 256 gen 270 top level 5 path @
ID 257 gen 270 top level 5 path @home
ID 258 gen 257 top level 5 path @snapshots
[...]
ID 266 gen 216 top level 258 path @snapshots/1/snapshot
ID 267 gen 218 top level 258 path @snapshots/2/snapshot
ID 268 gen 219 top level 258 path @snapshots/3/snapshot
ID 269 gen 237 top level 258 path @snapshots/4/snapshot
7. Updatedb
If locate is installed, skip indexing .snapshots directory by adding to /etc/updatedb.conf ...
PRUNENAMES = ".snapshots"
8. Grub-btrfs
Include the snapshots as boot options in the GRUB boot loader menu.
Install ...
$ sudo pacman -S grub-btrfs
Set the location of the directory containing the grub.cfg file in /etc/default/grub-btrfs/config.
Example: My grub.cfg is located in /efi/grub ...
GRUB_BTRFS_GRUB_DIRNAME="/efi/grub"
9. Auto-update GRUB
Enable grub-btrfs.path to auto-regenerate grub-btrfs.cfg whenever a modification appears in /.snapshots ...
$ sudo systemctl enable --now grub-btrfs.path
At the next boot, there is an submenu in GRUB for Arch Linux snapshots.
10. Read-only snapshots and overlayfs
Booting on a snapshot is done in read-only mode.
An elegant way is to boot this snapshot using overlayfs ... Using overlayfs, the booted snapshot will behave like a live-cd in non-persistent mode. The snapshot will not be modified, the system will be able to boot correctly, because a writeable folder will be included in the RAM ... Any changes in this system thus started will be lost when the system is rebooted/shutdown.
Add the hook grub-btrfs-overlayfs at the end of HOOKS in /etc/mkinitcpio.conf ...
HOOKS=(base ... fsck grub-btrfs-overlayfs)
Re-generate initramfs ...
$ sudo mkinitcpio -P
Note: Any snapshots that do not include this modified initramfs will not be able to use overlayfs.
11. System rollback the 'Arch Way'
Snapper includes a rollback tool, but on Arch systems the preferred method is a manual rollback.
After booting into a snapshot mounted rw courtesy of overlayfs, mount the toplevel subvolume (subvolid=5). That is, omit any subvolid or subvol mount flags (example: an encrypted device map labelled cryptdev) ...
$ sudo mount /dev/mapper/cryptdev /mnt
Move the broken @ subvolume out of the way ...
$ sudo mv /mnt/@ /mnt/@.broken
Or simply delete the subvolume ...
$ sudo btrfs subvolume delete /mnt/@
Find the number of the snapshot that you want to recover ...
$ sudo grep -r '<date>' /mnt/@snapshots/*/info.xml
[...]
/.snapshots/8/info.xml:  <date>2022-08-20 15:21:53</date>
/.snapshots/9/info.xml:  <date>2022-08-20 15:22:39</date>
Create a read-write snapshot of the read-only snapshot taken by Snapper ...
$ sudo btrfs subvolume snapshot /mnt/@snapshots/number/snapshot /mnt/@
Where number is the snapshot you wish to restore as the new @.
Unmount /mnt.
Reboot and rollback!
Create Services in Alpine Linux
I began my development adventure, as everyone else, with simple CLI apps (mostly incredibly useless...), and my next step was with web development.
First with Golang, then Node.js and then others.
Little by little, I learned to create decent-looking websites and I wanted to deploy them in my homelab. First, I did it on my first dedicated server, a Raspberry Pi 5 8Gb and it worked great! But then I bought a Dell Poweredge Rack Server to have a server hosting VMs.
There, I wanted to deploy my websites (my Portfolio and other little projects that could be of interest), but I wanted to keep the VMs really simple and lightweight, so I chose Alpine Linux, a great Linux distribution that keep things quite essential. I knew of it because it's one of the most used images with Docker, so it explains its optimization.
But, what if the VM crashes or needs to be rebooted, or, simply, if I need to reboot the Server?
Then I would need to restart manually all webservers in the many VMs... a lot of hassle and possible issues.
The answer to that problematic is to create a service that is started at boot time.
In systemd distributions, you need to create a service file, but Alpine Linux uses OpenRC instead.
Creating an OpenRC file
OpenRC files are located in /etc/init.d/, so first, you need to create a file there (the name of the file will be the name of the service):
sudo vim /etc/init.d/webserver
Then write your OpenRC file:
#!/sbin/openrc-run

# Service description
#
# This service starts the web server application
name=$RC_SVNAME
pidfile="/run/${RC_SVNAME}.pid"
# switch webserver to the name of your service in the two following lines (they are both optional configurations)
output_log="/var/log/webserver.log"
error_log="/var/log/webserver.err"

# Command needed to run the application
command="/path/to/your/webserver/executable"
# you can put all arguments below:
command_args="arg1 arg2 arg3"

# Command settings
command_background=true
# specify the user you wish to execute your webserver as:
command_user="www-data:www-data"

# Dependencies (most likely the network if it's a webserver, and there might be more if your application is more demanding)
depend() {
	need net
}
Make the file executable, otherwise, you'll not be able to run anything and the start command will fail:
sudo chmod 755 /etc/init.d/webserver
Warning!
You might need to give writing access to the user defined in the
command_userline for theoutput_loganderror_logfiles if you decide to specify them (they are optional)
Using Environment variables
If you need to use environment variables in your OpenRC, you need to create a configuration file in /etc/conf.d/ with the same name as the OpenRC file.
In it you can export all environment variables you might need, for example:
export WEBSERVER_PORT=4000
and then you can call it in the OpenRC file, for example:
command_args="port=${WEBSERVER_PORT}"
Managing the service created
Consult that Official documentation from the Alpine Linux website if you wish to know more about it from the official page.
To manipulate your service, you can use those three commands (replace webserver with the name of the service):
rc-service webserver start
rc-service webserver status
rc-service webserver stop
To enable your service at the default level (when booting the system normally):
Replace webserver with the name of the service.
rc-update add webserver default
To remove your service from all levels:
rc-update delete webserver -a
With that, you should be able to create your services and execute them automatically at boot time in your Alpine Linux servers!
Happy coding!
Almalinux LXC setup
Here is a simple review of what should be done in a newly created LXC using the image from Proxmox VE.
If you're installing a VM using the official .iso image, some packages might already be installed by default (eg. openssh-server and wget).
Step by step procedure
-
Install important packages
-
update and upgrade
sudo dnf update -y && dnf upgrade -y -
install basic packages (
gitandnet-toolsmight not be useful, depending on your usage)sudo dnf install -y vim git tar wget bind-utils net-tools openssh-server -
Optional: Docker installation
- Add Docker repository
sudo dnf install -y dnf-plugins-core sudo dnf config-manager --add-repo https://download.docker.com/linux/rhel/docker-ce.repo - Install Docker
sudo dnf install -y docker-ce docker-ce-cli containerd.io docker-buildx-plugin docker-compose-plugin - Enable Docker
sudo systemctl enable --now docker - Test Docker installation
docker run hello-world
- Add Docker repository
-
-
Create a user with sudo privileges (replace
thorganby the username of your choice)sudo adduser thorgan sudo usermod -aG wheel thorgan sudo passwd thorganIf you installed Docker in
step 1, you can give permission to your newly created user to use it:sudo usermod -aG docker thorganReplace
thorganby the username you created before. -
Open the port
22in the firewallsudo firewall-cmd --add-service=ssh --permanent sudo firewall-cmd --reload -
Start and enable
sshdto accept SSH connectionssudo service sshd start && systemctl enable sshd
Script procedure
#!/bin/bash
sudo dnf update -y && dnf upgrade -y
sudo dnf install -y vim git tar wget bind-utils net-tools openssh-server
read -p "Enter username: " user
sudo adduser "$user"
sudo usermod -aG wheel "$user"
sudo passwd "$user"
sudo firewall-cmd --add-service=ssh --permanent
sudo firewall-cmd --reload
sudo service sshd start && systemctl enable sshd
Script with docker installation
#!/bin/bash

# Update & Upgrade
sudo dnf update -y && dnf upgrade -y
# Install necessary packages
sudo dnf install -y dnf-plugins-core vim git tar wget bind-utils net-tools openssh-server

# Adding docker repository
sudo dnf config-manager --add-repo https://download.docker.com/linux/rhel/docker-ce.repo
# Install docker
sudo dnf install -y docker-ce docker-ce-cli containerd.io docker-buildx-plugin docker-compose-plugin
# Enable docker
sudo systemctl enable --now docker
# Test docker installation
docker run hello-world

# Create sudoer user
read -p "Enter username: " user
sudo adduser "$user"
sudo usermod -aG wheel "$user"
sudo usermod -aG docker "$user"
sudo passwd "$user"

# Open port 22 on the firewall
sudo firewall-cmd --add-service=ssh --permanent
sudo firewall-cmd --reload

# Enable & Start SSH
sudo service sshd start && systemctl enable sshd
Create/extend SWAP using LVM
This articles comes from 2daygeek.com. All rights belong to them.
We use LVM for flexible volume management on Linux, so why not use LVM for swap space?
This allows users to increase the swap partition whenever they want.
Generally you need to create a swap space on Linux, but it is recommended that you create swap space on Linux when you have less RAM.
If you are upgrading your system RAM, it is necessary to add more swap space.
This allows you to manage the running of applications that require large amounts of memory.
Swap on Linux can be created in three ways.
- This may be a new swap partition.
- This may be a new swap file.
- You can extend this from an existing logical volume (LVM).
It’s recommended to create a dedicated swap partition instead of a swap file.
If you are looking for alternative ways to create swap space on Linux then you can read the following articles.
- 3 Easy ways to create or extend swap space in Linux
- Automatically Create/Remove and Mount swap file in Linux using Shell script
Why is swap Needed?
There are many reasons why you need a swap, but I’ve listed only a few reasons.
- If your system has very little RAM (less than 1 or 2 GB), you should use swap since most applications will run out of RAM quickly.
- You may need to create a swap on your system as suggested by the application vendor.
What is the Recommended swap Size on Linux?
Generally, the recommended swap size is twice the amount of RAM, but this is no longer applicable to modern computers. What is the amount of swap when you have 32GB or 64GB or 128GB of RAM?
Each of the distributions has a different approach to swap space, and the Red Hat recommendation for swap space is below.
| Physical RAM | Recommended Swap Size | Recommended Swap Size with Hibernation |
| 2GB or less | Twice the installed RAM | 3 times the amount of RAM |
| > 2GB – 8GB | The same amount of RAM | 2 times the amount of RAM |
| > 8GB – 64GB | At least 4GB | 1.5 times the amount of RAM |
| > 64GB or more | At least 4GB | Hibernation not recommended |
What is the Swap Space
Swap space in Linux is used when the amount of physical memory (RAM) is full. When physical RAM is full, inactive pages in memory are moved to the swap space.
This helps system to run the application continuously but it’s not considered a replacement for more RAM.
Swap space is located on hard drives so, it will not processing the request like physical RAM.
How to Create a Swap Partition Using LVM
Follow the following procedure for creating swap space because you already know how to create a logical volume.
Create a logical volume that you need. In my case I’m going to create the 5GB of the swap partition.
$ sudo lvcreate -L 5G -n LogVol_swap1 vg00
  Logical volume "LogVol_swap1" created.
Format the newly created swap space as follows.
$ sudo mkswap /dev/vg00/LogVol_swap1
Setting up swapspace version 1, size = 5 GiB (5368705024 bytes)
no label, UUID=d278e9d6-4c37-4cb0-83e5-2745ca708582
Add the following entry to the /etc/fstab file.
# vi /etc/fstab
/dev/mapper/vg00-LogVol_swap1   swap     swap    defaults     0 0
Enable the swap partition.
$ sudo swapon -va
swapon: /swapfile: already active -- ignored
swapon: /dev/mapper/vg00-LogVol_swap1: found signature [pagesize=4096, signature=swap]
swapon: /dev/mapper/vg00-LogVol_swap1: pagesize=4096, swapsize=5368709120, devsize=5368709120
swapon /dev/mapper/vg00-LogVol_swap1
Check if the swap space is added correctly.
$ cat /proc/swaps Filename Type Size Used Priority /swapfile file 1459804 526336 -1 /dev/dm-0 partition 5242876 0 -2$ free -g total used free shared buff/cache available Mem: 1 1 0 0 0 0 Swap: 6 0 6
How to Extend a Swap Partition Using LVM
Follow the procedure below to extend the LVM swap partition.
Disable swap partitioning for the corresponding logical volume before resizing.
$ sudo swapoff -v /dev/vg00/LogVol_swap1
swapoff /dev/vg00/LogVol_swap1
Resize the logical volume. We are increasing the swap partition from 5GB to 11GB.
$ sudo lvresize /dev/vg00/LogVol_swap1 -L +6G
  Size of logical volume vg00/LogVol_swap1 changed from 5.00 GiB (1280 extents) to 11.00 GiB (2816 extents).
  Logical volume vg00/LogVol_swap1 successfully resized.
Format before enable the new swap space.
$ sudo mkswap /dev/vg00/LogVol_swap1
mkswap: /dev/vg00/LogVol_swap1: warning: wiping old swap signature.
Setting up swapspace version 1, size = 11 GiB (11811155968 bytes)
no label, UUID=2e3b2ee0-ad0b-402c-bd12-5a9431b73623
Run the command below to enable the extended swap partition.
$ sudo swapon -va
swapon: /swapfile: already active -- ignored
swapon: /dev/mapper/vg00-LogVol_swap1: found signature [pagesize=4096, signature=swap]
swapon: /dev/mapper/vg00-LogVol_swap1: pagesize=4096, swapsize=11811160064, devsize=11811160064
swapon /dev/mapper/vg00-LogVol_swap1
Finally check that the swap space is correctly added with the free command.
$ free -g
              total        used        free      shared  buff/cache   available
Mem:              1           1           0           0           0           0
Swap:            12           0          12
$ cat /proc/swaps
Filename				Type		Size	Used	Priority
/swapfile                               file		1459804	237024	-1
/dev/dm-0                               partition	11534332	0	-2
Almalinux install nodejs 22
- Enable nodejs version 22 in the dnf repository:
dnf module enable nodejs:22
The result should be like that:
Last metadata expiration check: 2:29:44 ago on Sun 01 Jun 2025 07:37:42 AM UTC.
Dependencies resolved.
==================================================================================================================
 Package                    Architecture              Version                    Repository                  Size
==================================================================================================================
Enabling module streams:
 nodejs                                               22

Transaction Summary
==================================================================================================================

Is this ok [y/N]: y
Complete!
- Install nodejs and npm
dnf install -y nodejs npm
Running chronyd on Almalinux LXC (Proxmox)
When running chronyd on AlmaLinux OS on a Proxmox Server, it may raise permission issues, because the container is not privileged.
To resolve that issue, you only need to add -x to the options in the UNIT file of the chronyd service.
Create system user with custom home directory
To create a system user to run an app, you can use the useradd command.
Here is an example to create one with a custom home directory:
sudo useradd -d /opt/app -m -r -G docker,www-data docker-website
That docker-website user will have its home directory at /opt/app that will be created if it doesn't exists (if it does, you'll have to change its owner), will be a system user and will be in two groups, docker and www-data.
What's different between Ctrl+Z and Ctrl+C in Unix command line
Found this explanation on this forum post (thanks to @Wuffers for the post).
Control+Z is used for suspending a process by sending it the signal SIGTSTP, which cannot be intercepted by the program. While Control+C is used to kill a process with the signal SIGINT, and can be intercepted by a program so it can clean its self up before exiting, or not exit at all.
If you suspend a process, this will show up in the shell to tell you it has been suspended:
[1]+ Stopped yes
However, if you kill one, you won't see any confirmation other than being dropped back to a shell prompt. When you suspend a process, you can do fancy things with it, too. For instance, running this:
fg
With a program suspended will bring it back to the foreground.
And running the command
bg
With a program suspended will allow it to run in the background (the program's output will still go to the TTY, though).
If you want to kill a suspended program, you don't have to bring it back with fg first, you can simply do the command:
kill %1
If you have multiple suspended commands, running
jobs
will list them, like this:
[1]-  Stopped                 pianobar
[2]+  Stopped                 yes
Using %#, where # is the job number (the one in square brackets from the jobs output) with bg, fg, or kill, can be used to do the action on that job.
Change LXC from unprivileged to privileged
Article taken from Bobcares: original post
From the Proxmox GUI
-
First, log in to the Proxmox Web UI and access the dashboard.
-
Next, we have to shut down the LXC Container. So, click the container on the left panel and click Shutdown from the top menu.
-
Then, take a backup. So, go to the Backup tab and click Backup now. Keep default settings or customize as needed. Once you click “Backup,” wait for the “TASK OK” message.
-
Now, restore as Privileged. So, click on the backup file in the list and click Restore. Then, select ‘Privileged’ under privilege options and click ‘Restore’ again.
-
Then, start the container and confirm that it is running in privileged mode.
Accès aux installations de linux après réactivation du secure boot
Le fait d'avoir rétabli le Secure Boot bloque probablement le démarrage d'Ubuntu 26.04 car son chargeur d'amorçage (shim) ou son noyau n'est plus reconnu comme signé et digne de confiance par le firmware UEFI.
Voici les solutions :
1. Désactiver temporairement le Secure Boot (solution rapide)
Le moyen le plus simple de retrouver l'accès à Ubuntu est de désactiver le Secure Boot dans le BIOS/UEFI de votre machine.
- Redémarrez et appuyez sur la touche d'accès au BIOS (souvent F2, F10, Del).
- Allez dans l'onglet Security ou Boot.
- Désactivez Secure Boot.
- Sauvegardez et quittez. Ubuntu devrait alors démarrer normalement.
2. Réactiver le Secure Boot avec une clé MOK (solution permanente)
Si vous souhaitez garder le Secure Boot activé, votre installation d'Ubuntu a probablement besoin d'enregistrer sa clé propriétaire (MOK).
- Désactivez temporairement le Secure Boot (comme ci-dessus) pour démarrer sur Ubuntu.
- Ouvrez un terminal et vérifiez l'état :
sudo mokutil --sb-state
- Si des clés doivent être enregistrées, redémarrez. Pendant le démarrage, une interface MOK Management (blue screen) devrait apparaître.
- Suivez les instructions pour enregistrer une nouvelle clé (Enroll MOK).
- Une fois l'inscription réussie, réactivez le Secure Boot dans le BIOS/UEFI.
Cela permettra à Ubuntu de démarrer tout en conservant la sécurité du Secure Boot.
Comment obtenir une clé MOK ?
Pour obtenir une clé MOK (Machine Owner Key) afin de réactiver Secure Boot de façon permanente, vous devez générer une paire de clés (privée/publique) que le gestionnaire shim pourra reconnaître. Voici la procédure :
Générer une clé MOK
- **Créez le répertoire, s’il n’existe pas, pour stocker la clé :
sudo mkdir -p /var/lib/shim-signed/mok
cd /var/lib/shim-signed/mok
- Générez la clé privée et le certificat DER (format requis par UEFI) :
sudo openssl req -new -x509 -newkey rsa:2048 -keyout MOK.priv -outform DER -out MOK.der -days 36500 -subj "/CN=MaCléMOK/" -nodes
- Convertissez le certificat en format PEM (nécessaire pour certaines opérations) :
sudo openssl x509 -inform DER -in MOK.der -out MOK.pem
- Restreignez les permissions :
sudo chmod 600 MOK.priv
sudo chmod 644 MOK.der MOK.pem
Enregistrer la clé dans le système (Bios)
- Importez la clé pour enregistrement :
sudo mokutil --import MOK.der
- Vous devrez définir un mot de passe temporaire (à utiliser au prochain démarrage).
- Redémarrez :
sudo reboot
- Au démarrage, l’écran MokManager (bleu) apparaît :
- Sélectionnez « Enroll MOK » → « Continue » → « Yes »
- Saisissez le mot de passe défini précédemment
- Confirmez et redémarrez
- Vérifiez l’enregistrement :
sudo mokutil --list-enrolled | grep "MaCléMOK"
Après avoir "enroll" le nouvel OS
1- Aller dans le bios et activer si nécessaire le secureboot
2- Aller dans le menu boot :
Sélectionner l’entrée que vous venez de créer
3- Redémarrer après avoir sauvegardé
Le démarrage devrait alors fonctionner
Nota : il ne faut pas choisir le nouvel OS que vous venez d’enregistrer sans changer le démarrage dans le bios : Si par exemple vous aviez juqu’à présent un menu Ubuntu séléectionné, le nouvel OS qui n’est pas Ubuntu ne fonctionnera pas en mode secureboot activé. Il faut donc passerr par le bios et sélectionner le nouvel OS qui va maintenant apparaître et ensuite sauvegarder en sortant du bios. Le nouvel OS devrait fonctionner avec secure boot activé.
❗ Si vous avez besoin de votre clé MOK (ex : pour des modules DKMS)
Alors, **ne signez pas **shim, mais signez uniquement les modules (comme vboxdrv, nvidia.ko, etc.) avec votre clé MOK, sans toucher au chargeur.
- Utilisez sign-file pour signer les modules.
- Assurez-vous que le shim et grub restent ceux signés par Debian.
🔒 Vérification finale
Après correction :
mokutil --sb-state
Doit afficher : SecureBoot enabled
Et :
dmesg | grep -i secureboot
Doit confirmer que le noyau a démarré en mode Secure Boot.
Comment gérer plusieurs clés MOK ?
Il est possible de gérer plusieurs clés MOK (Machine Owner Key) sur un même système. Chaque clé est stockée dans la NVRAM UEFI et peut être utilisée pour signer des modules noyau ou des binaires EFI. Voici comment les gérer efficacement.
1. Lister les clés MOK existantes
Pour voir les clés déjà inscrites :
sudo mokutil --list-enrolled
Pour voir les demandes d’importation ou de suppression en attente :
sudo mokutil --list-new
sudo mokutil --list-delete
2. Importer plusieurs clés
Vous pouvez importer plusieurs clés .der indépendamment :
sudo mokutil --import /chemin/vers/MOK1.der
sudo mokutil --import /chemin/vers/MOK2.der
Un mot de passe temporaire est demandé pour chaque clé. L’inscription se fait au redémarrage via l’interface MokManager.
3. Supprimer une clé MOK inutile
Si une clé n’est plus nécessaire :
sudo mokutil --delete /chemin/vers/MOK.der
Le fichier .der original est requis. Au redémarrage, MokManager demandera confirmation de la suppression.
4.Exporter les clés pour sauvegarde
Exporter les clés inscrites :
sudo mokutil --export
Cela sauvegarde les certificats .cer dans le répertoire courant.
5. Bonnes pratiques
- Nommez vos clés différemment (ex. MOK-nvidia.der, MOK-vbox.der) pour éviter les conflits.
- Stockez les clés dans /var/lib/shim-signed/mok/ ou /etc/keys/.
- Une limite matérielle existe (dépend de la NVRAM), mais une dizaine de clés est généralement supportée.
-
Pour définir l’ordre de démarrage :
Pour définir l'ordre de démarrage avec efibootmgr, utilisez l'option -o ou --bootorder suivie de la liste des identifiants de démarrage, séparés par des virgules.
Commande de base
sudo efibootmgr -o XXXX,YYYY,ZZZZ
Remplacez XXXX, YYYY, ZZZZ par les numéros des entrées de démarrage (visibles via efibootmgr sans arguments), dans l'ordre souhaité.
Exemple
Si vous souhaitez que Windows Boot Manager (Boot0005) démarre en premier, suivi d' Ubuntu (Boot0006), puis d'autres entrées :
sudo efibootmgr -o 0005,0006,0001,0002
🔍 Utilisez efibootmgr ou efibootmgr -v pour afficher la liste actuelle des entrées et leur ordre.
Cas à gérer :
J'ai les entrées suivantes :
Boot0001* Ubuntu HD(..à quoi correspond ce contenu ?.)/\EFI\ubuntu\shimx64.efi pour l'entrée unbuntu 24.4.
Boot0004* debian, HD(...)/\EFI\debian\shimx64.efi
Boot0002* Linux Boot Manager HD()\EFI\systemd\systemd-bootx64.efi
Boot0003* NixOS-boot HD()/\EFI\NixOS-boot\grubx64.efi
L'entrée 4 debian ne fonctionne pas avec secureboot activé : pourquoi ?
les entrées 2 et 3 ne fonctionnent pas
Pouvez vous m'expliquer ?
Explication des entrées UEFI et problèmes liés à Secure Boot
Les entrées UEFI que vous observez correspondent à différents chargeurs d'amorçage installés sur votre système. Voici ce qu'elles signifient :
- Boot0001 Ubuntu*: Pointe vers \EFI\ubuntu\shimx64.efi. C’est le chargeur utilisé pour démarrer Ubuntu avec Secure Boot activé, car shimx64.efi est signé par Microsoft.
- Boot0004 Debian*: Pointe vers \EFI\debian\shimx64.efi. Normalement, cette entrée devrait fonctionner avec Secure Boot, mais seulement si :
- Le fichier shimx64.efi est correctement signé.
- L’entrée UEFI est bien configurée et reconnue par le firmware.
- Aucune corruption ou mauvaise installation du paquet shim-signed n’a eu lieu.
- Boot0002 Linux Boot Manager*: Correspond à systemd-bootx64.efi. Ce chargeur ne supporte pas nativement Secure Boot sauf si le binaire est signé ou si le firmware l’a explicitement approuvé.
-
Boot0003 NixOS-boot*: Utilise grubx64.efi via GRUB. GRUB non signé ne fonctionne pas avec Secure Boot, sauf si shim est utilisé comme intermédiaire.
Pourquoi Debian (entrée 4) ne démarre pas avec Secure Boot ?
L’entrée Debian ne fonctionne pas car, bien qu’elle pointe vers shimx64.efi, il est possible que :
- Le paquet shim-signed ou grub-efi-amd64-signed ne soit pas correctement installé.
- Le firmware n’a pas chargé la clé Debian via shim, ou une mise à jour a corrompu la chaîne de confiance.
- L’entrée NVRAM est mal configurée ou obsolète.
Solution : Réinstallez les paquets nécessaires avec :
sudo apt install --reinstall shim-signed grub-efi-amd64-signed
Puis réinstallez GRUB :
sudo grub-install --target=x86_64-efi --efi-directory=/boot/efi --uefi-secure-boot
Pourquoi les entrées 2 (systemd-boot) et 3 (GRUB NixOS) ne fonctionnent pas ?
- systemd-boot** (entrée 2)** : Ce chargeur n’est pas signé pour Secure Boot. Il ne démarrera pas si Secure Boot est activé, sauf si vous avez désactivé la vérification ou ajouté vos propres clés.
- GRUB NixOS** (entrée 3)** : Utilise grubx64.efi directement. **Sans **shim, ce binaire n’est pas approuvé par Secure Boot, donc le démarrage échoue.
🔐 Rappel : Seuls les chargeurs signés (comme shimx64.efi) peuvent démarrer sous Secure Boot. grubx64.efi ou systemd-bootx64.efi doivent passer par shim ou être signés manuellement.
Résumé
| Entrée | Chargeur | Fonctionne avec Secure Boot ? | Cause probable d’échec |
| Ubuntu | shimx64.efi | ✅ Oui | Correctement configuré |
| Debian | shimx64.efi | ❌ Non | Paquets mal installés ou clé non chargée |
| systemd-boot | systemd-bootx64.efi | ❌ Non | Non signé, incompatible sans configuration |
| NixOS (GRUB) | grubx64.efi | ❌ Non | Lancé directement, sans shim |
Quelques explications sur le MOK
La désactivation de Secure Boot est un paramètre de micrologiciel ("BIOS setting", bien que tous les systèmes avec Secure Boot aient un UEFI au lieu du BIOS hérité).
Donc, à moins que vous ne réinitialisiez vos paramètres de micrologiciel (nom de l'héritage: "réinitialisation CMOS"), ou que vous effectuiez une mise à jour du micrologiciel système ("mise à jour BIOS") et que la mise à jour réinitialise vos paramètres de micrologiciel pour vous, Secure Boot devrait rester désactivé à moins que vous ne l'activiez à nouveau.
Réinstaller le système d'exploitation ou le pilote Nvidia ne devrait pas du tout avoir d'effet sur l'état de démarrage sécurisé.
Le "mot de passe MOK" semble souvent mal compris.
Ubuntu inclut l'automatisation pour créer et enregistrer une clé de propriétaire de machine (MOK) pour Secure Boot, si le système a Secure Boot activé. Le processus d'enregistrement peut être démarré, mais ne peut pas être terminé pendant l'exécution d'un système d'exploitation, car le processus d'enregistrement doit être certain que la commande d'enregistrement du MOK provient réellement de l'utilisateur, et non de tout programme qui prétend être l'utilisateur.
Ainsi, lorsque Ubuntu crée un MOK, il vous oblige à définir un mot de passe unique pour compléter le processus d'enregistrement MOK. La prochaine fois que vous démarrez, Secure Boot validera d'abord la signature de Microsoft sur le shimx64.efiChargeur de démarrage sécurisé, puis shimx64.efidétectera qu'un processus d'enregistrement MOK a été lancé. Il interrompra le processus de démarrage et vous présentera l'écran bleu MOK Manager. Si vous choisissez de terminer le processus d'inscription MOK, il vous demandera de saisir le mot de passe que vous avez défini avant de redémarrer pour confirmer que 1.) vous êtes l'utilisateur qui a commencé le processus et 2.) vous voulez vraiment terminer le processus d'enregistrement MOK.
Après cela, le "mot de passe MOK" n'est plus jamais nécessaire: son travail est fait. Si le MOK est perdu parce que les paramètres du micrologiciel système sont réinitialisés pour une raison quelconque, vous devrez refaire le processus d'enregistrement MOK dès le début.
Le MOK réel sera situé dans /var/lib/shim-signed/mok/répertoire une fois qu'il a été créé. Il s'agit d'une clé cryptographique en deux parties: la partie publique, également appelée certificat, sera dans le MOK.derfichier. C'est la partie qui est enregistrée dans le firmware du système. Vous pouvez le visualiser sous une forme lisible par l'homme avec n'importe quelle commande qui peut gérer les certificats X.509 au format DER, par exemple:
sudo openssl x509 -inform DER -in /var/lib/shim-signed/mok/MOK.der -noout -text
La partie privée sera seulement dans le MOK.privfichier, lisible uniquement par root. Ce fichier sera automatiquement utilisé par dkmset d'autres outils de gestion de noyau et de modules si nécessaire pour signer par ex. Les modules de pilote Nvidia dans le cadre de leur processus d'installation si Secure Boot est activé.
Récupéré sur le web
J'ai un ordinateur portable double boot Windows 10 / Linux mint 20. Démarrage sécurisé activé et aussi cryptage de disque dur, mais ce dernier n'est peut-être pas important pour la question.
En passant, ma question est très similaire à celle-ci: https://forums.linuxmint.com/viewtopic.php? t=274365
J'ai installé Windows et après ça - Linux Mint. Après l'installation de la Monnaie, l'ordinateur a redémarré et on m'a demandé de "Continuer le démarrage" ou "Enrôler MOK". Je ne savais pas quoi faire et je suis allé chercher en ligne sur l'autre ordinateur portable. Pendant la recherche, le dialogue semble chronométré et l'ordinateur a juste continué à démarrer. L'ordinateur portable est Dell Vostro 5581 mis à jour vers le dernier BIOS.
Plus tard le même jour, j'ai installé Virtualbox à partir du site Web d'Oracle (pas à partir du dépôt). Lors de l'installation en mode texte sur la console il m'a demandé de confirmer que je voulais inscrire MOK sur le prochain redémarrage et entrer un mot de passe temporaire. J'ai fait et redémarré et inscrit le MOK. (Ne sachant pas ce que je fais, au fait)
Alors, voici mes questions. Tout ce truc de démarrage sécurisé est très nouveau pour moi.
- Quelle est la boîte de dialogue initiale "Continuer le démarrage" ou "Enrôler MOK" qui s'affiche lorsque vous installez Mint et redémarrez pour la première fois? Cela apparaît avant même que le système d'exploitation ne démarre. Je pense que c'est un truc de BIOS. Et cela ne semble pas être important si vous continuez simplement à démarrer ou à inscrire la clé. J'ai fait 2 installations Linux et dans la 1-st, j'ai choisi d'inscrire la clé, mais sur le 2-et l'a ignoré. Il ne semblait pas y avoir de différence.
- Si j'avais inscrit la clé MOK, Virtualbox aurait-il installé sans me demander de faire quoi que ce soit? Qu'est-ce que VirtualBox exactement quand il inscrit sa propre clé?
- Comment puis-je faire le "Enroll MOK" maintenant après avoir installé et configuré mon système et vraiment ne pas vouloir réinstaller à nouveau? L'autre question sur le forum (voir lien ci-dessus) a une réponse disant:
J'ai eu le même problème. Pour définir un nouveau mot de passe MOK, j'ai utilisé la commande
sudo update-secureboot-policy --enroll-key
Cependant, sur mon installation, il n'y a pas de telle commande update-secureboot-policy. - Maintenant, j'ai peur d'installer les pilotes propriétaires NVidia, parce que je n'ai pas inscrit MOK et j'ai peur que cela ne fonctionne pas.
- Et, généralement, que fait cette chose "Enrôlement MOK" après le 1-st reboot? Je ne comprends vraiment pas. Cela signifie-t-il qu'il met certaines clés Ubuntu dans le BIOS? Est-ce que cela signifie que si je le fais, alors tous les futurs modules de noyau propriétaires que j'installe se produiront sans problème sans inscrire leurs propres MOK?
Réponses
1. Quelle est la boîte de dialogue initiale "Continuer le démarrage" ou "Enrôler MOK" qui s'affiche lorsque vous installez Mint et redémarrez pour la première fois?
Cela est produit par shimx64.efilorsqu'il détecte qu'il existe un nouveau MOK dans une variable UEFI NVRAM accessible au système d'exploitation, en attente d'installation.
2. Si j'avais inscrit la clé MOK, Virtualbox aurait-il installé sans me demander de faire quoi que ce soit?
Très probablement, oui.
2.5. Qu'est-ce que VirtualBox exactement quand il inscrit sa propre clé?
Ça ne fait probablement que déclencher update-secureboot-policy --enroll-keysi elle est disponible.
3. Comment puis-je faire le "Enroll MOK" maintenant après avoir installé et configuré mon système et vraiment ne pas vouloir réinstaller à nouveau?
sudo apt install shim-signed
sudo update-secureboot-policy --enroll-key
4. Maintenant, j'ai peur d'installer les pilotes propriétaires NVidia, parce que je n'ai pas inscrit MOK et j'ai peur que cela ne fonctionne pas.
Techniquement pas une question, mais ne vous inquiétez pas. Si vous installez le pilote NVidia via l'outil de gestion de pilote tiers d'Ubuntu/Mint, il fera probablement les étapes énumérées dans 3.) ci-dessus pour vous si vous n'avez pas déjà fait cela.
Si vous utilisez le package d'installation téléchargé directement depuis NVidia, installez d'abord un dkmsoutil de gestion pour les modules tiers, puis exécuter le programme d'installation du pilote NVidia:
sudo apt install dkms

sudo ./NVIDIA-Linux-x86_64-<version number>.run --dkms \
    --module-signing-secret-key=/var/lib/shim-signed/mok/MOK.priv \
    --module-signing-public-key=/var/lib/shim-signed/mok/MOK.der
dkmsautomatise la reconstruction des modules de noyau tiers (comme le pilote NVidia) de sorte que vous n'aurez pas à le faire manuellement chaque fois que vous recevez une mise à jour de sécurité du noyau.
5. Et, généralement, que fait cette chose "Enrôlement MOK" après le 1-st reboot?
Si vous ne faites pas le "Enroll MOK" sur le prochain redémarrage juste après la course update-secureboot-policy --enroll-key, la procédure d'inscription sera en attente, en attendant que vous le complétiez en sélectionnant "Enrôler MOK" sur une chaussure ultérieure, ou de l'annuler avec sudo mokutil --revoke-importdans Linux.
Une fois que vous avez terminé la procédure d'inscription MOK, vous ne devriez pas voir cette invite à nouveau à moins de perdre l'ancien MOK et d'en inscrire un nouveau.
5.1. Cela signifie-t-il qu'il met certaines clés Ubuntu dans le BIOS?
Non, la procédure d'inscription fait une clé unique à votre système et le place dans /var/lib/shim-signed/mok/accessible à root uniquement, de sorte que les processus d'installation du module du noyau peuvent l'utiliser, et inscrit une copie de la partie publique de la clé à une variable UEFI NVRAM, de sorte qu'il peut être utilisé par shimx64.efilors du démarrage.
5.2. Est-ce que cela signifie que si je le fais, alors tous les futurs modules de noyau propriétaires que j'installe se produiront sans problème sans inscrire leurs propres MOK?
C'est ça l'idée, oui. Malheureusement, tous les paquets sources de modules de noyau tiers n'ont pas encore été mis à jour pour détecter de manière transparente la présence de MOK et l'utiliser automatiquement si nécessaire.
sur mon installation, il n'y a pas de telle mise à jour de commande-secureboot-policy
Sur mon système Ubuntu, cette commande est dans le shim-signedpaquet.